# 0 技术体系 :
- SpringCloud
- SpringCloud Alibaba
- SpringCloud Alibaba Nacos
- SpringCloud Feign
- SpringCloud Gateway
# 1 模块设计
- cloud01-demo
- api-gateway
- API 网关模块。集中了所有服务的接口,并根据请求 url 将请求转发到对应的微服务上
- user-services-module
- others-services-module
# 2 项目基础搭建
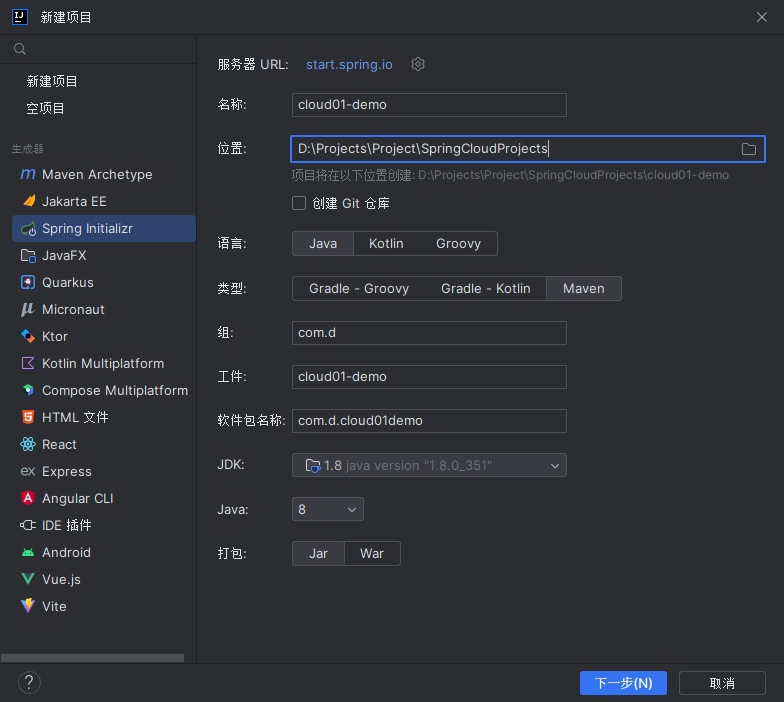
# 2.1 新建项目
![image.png]()
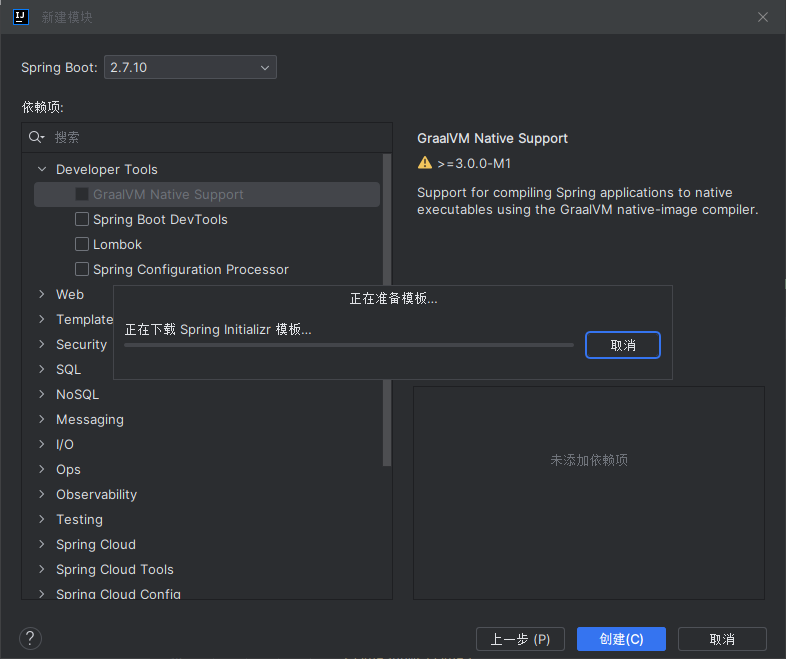
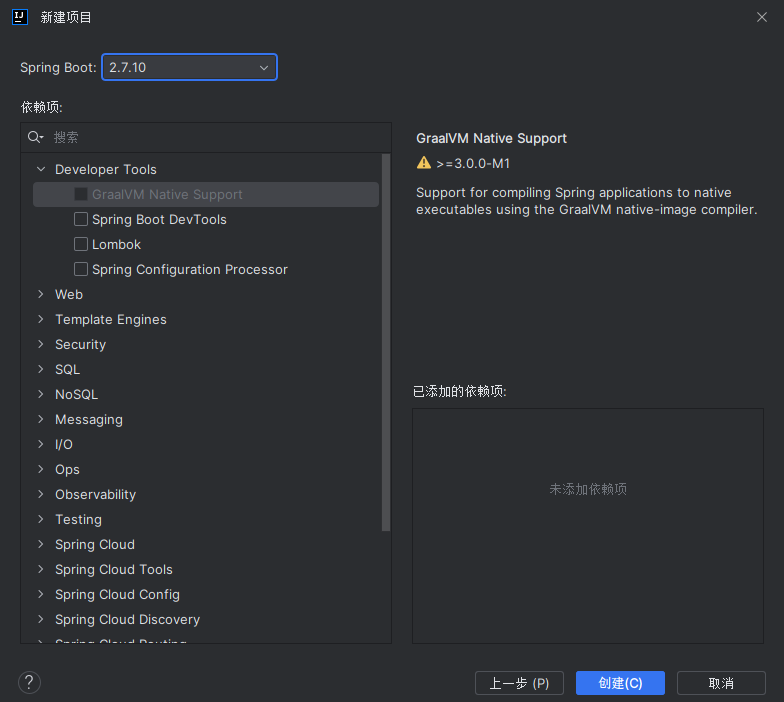
# 2.2 选择 SpringBoot 版本和依赖
这里什么都不选,留空![image.png]()
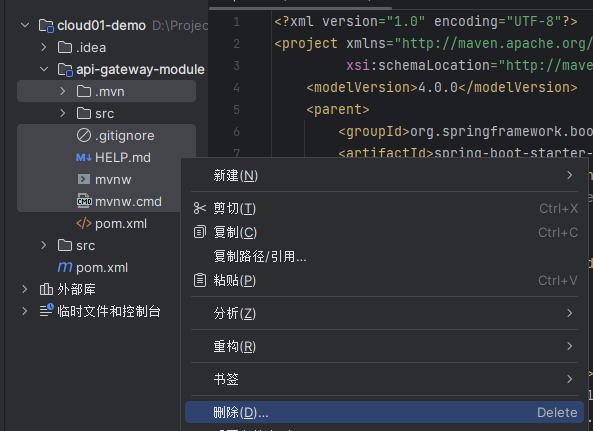
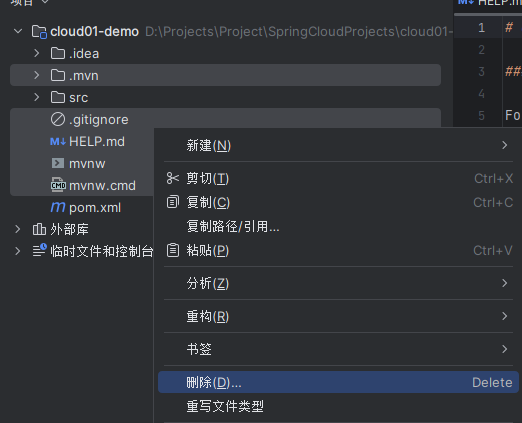
# 2.3 删除杂项
暂时不知道是什么的东西,记得把 src 也删了,截图的时候删漏了![image.png]()
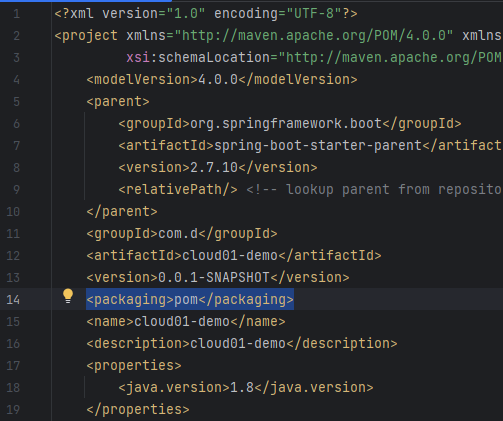
# 2.4 修改打包方式为 pom
![image.png]()
# 2.5 确定版本
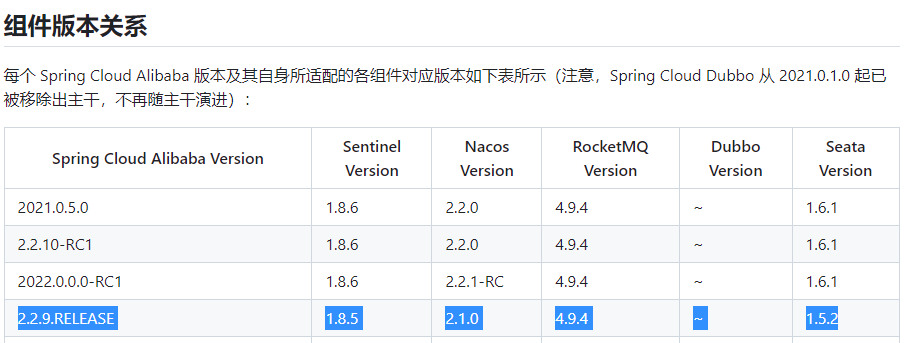
SpringCloud 和 SpringCloudAlibaba 和 SpringBoot 的版本对应关系在:版本说明首先确定 **Spring Cloud Alibaba Version** 的版本,然后根据该版本来确定各组件的版本我这里就选用 2.2.9.RELEASE![image.png]() 通过这里可知,Nacos 需要 2.1.0 的版本。那么就需要在服务器上安装 2.1.0 的 Nacos 环境。这里就不赘述了,按照 Nacos 官网文档来即可。然后其他组件的版本也可以确定了最终选择的版本信息如下:
通过这里可知,Nacos 需要 2.1.0 的版本。那么就需要在服务器上安装 2.1.0 的 Nacos 环境。这里就不赘述了,按照 Nacos 官网文档来即可。然后其他组件的版本也可以确定了最终选择的版本信息如下:
| 组件名称 |
组件版本 |
| Spring Cloud Alibaba |
2.2.9.RELEASE |
| Spring Cloud Alibaba Nacos |
2.1.0 |
| Spring Cloud |
Spring Cloud Hoxton.SR12 |
| Spring Boot Version |
2.3.12.RELEASE |
# 2.6 添加依赖管理并修改父项目的版本
最终 cloud01-demo 项目的 pom 文件如下:
| <?xml version="1.0" encoding="UTF-8"?> |
| <project xmlns="http://maven.apache.org/POM/4.0.0" xmlns:xsi="http://www.w3.org/2001/XMLSchema-instance" |
| xsi:schemaLocation="http://maven.apache.org/POM/4.0.0 https://maven.apache.org/xsd/maven-4.0.0.xsd"> |
| <modelVersion>4.0.0</modelVersion> |
| <parent> |
| <groupId>org.springframework.boot</groupId> |
| <artifactId>spring-boot-starter-parent</artifactId> |
| <version>2.3.12.RELEASE</version> |
| <relativePath/> |
| </parent> |
| <groupId>com.d</groupId> |
| <artifactId>cloud01-demo</artifactId> |
| <version>0.0.1-SNAPSHOT</version> |
| <packaging>pom</packaging> |
| |
| <properties> |
| <java.version>1.8</java.version> |
| <spring-cloud.version>Hoxton.SR12</spring-cloud.version> |
| <spring-cloud-alibaba.version>2.2.9.RELEASE</spring-cloud-alibaba.version> |
| </properties> |
| |
| <dependencyManagement> |
| <dependencies> |
| <dependency> |
| <groupId>org.springframework.boot</groupId> |
| <artifactId>spring-boot-dependencies</artifactId> |
| <version>${parent.version}</version> |
| <scope>import</scope> |
| <type>pom</type> |
| </dependency> |
| <dependency> |
| <groupId>org.springframework.cloud</groupId> |
| <artifactId>spring-cloud-dependencies</artifactId> |
| <version>${spring-cloud.version}</version> |
| <scope>import</scope> |
| <type>pom</type> |
| </dependency> |
| <dependency> |
| <groupId>com.alibaba.cloud</groupId> |
| <artifactId>spring-cloud-alibaba-dependencies</artifactId> |
| <version>${spring-cloud-alibaba.version}</version> |
| <scope>import</scope> |
| <type>pom</type> |
| </dependency> |
| </dependencies> |
| </dependencyManagement> |
| |
| <build> |
| <plugins> |
| <plugin> |
| <groupId>org.springframework.boot</groupId> |
| <artifactId>spring-boot-maven-plugin</artifactId> |
| </plugin> |
| </plugins> |
| </build> |
| |
| </project> |
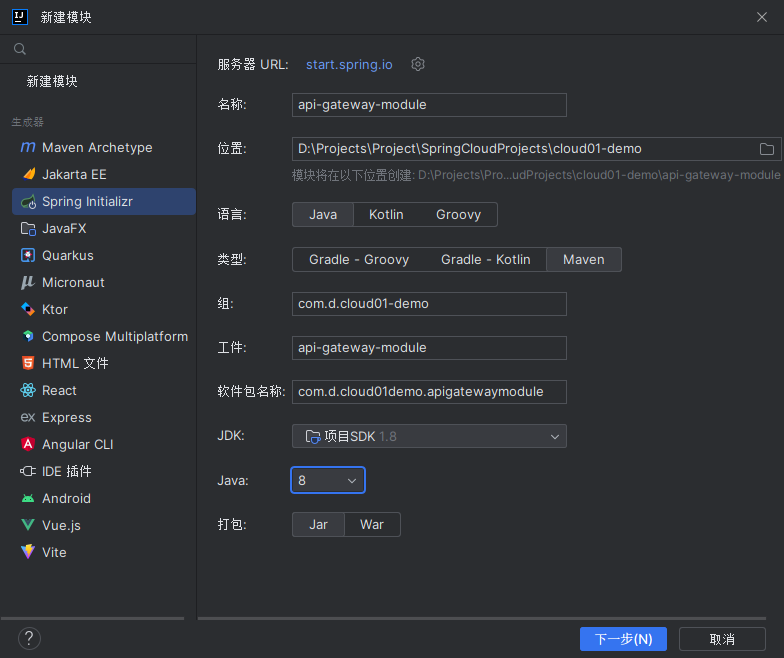
# 2.7 创建 api-gateway 模块
# 2.7.1 新建模块
![image.png]()
![image.png]()
# 2.7.2 删除杂项文件
![image.png]()
# 2.7.3 修改 pom 文件为如下
| <?xml version="1.0" encoding="UTF-8"?> |
| <project xmlns="http://maven.apache.org/POM/4.0.0" xmlns:xsi="http://www.w3.org/2001/XMLSchema-instance" |
| xsi:schemaLocation="http://maven.apache.org/POM/4.0.0 https://maven.apache.org/xsd/maven-4.0.0.xsd"> |
| <modelVersion>4.0.0</modelVersion> |
| <parent> |
| <groupId>com.d</groupId> |
| <artifactId>cloud01-demo</artifactId> |
| <version>0.0.1-SNAPSHOT</version> |
| <relativePath>../pom.xml</relativePath> |
| </parent> |
| <groupId>com.d.cloud01-demo</groupId> |
| <artifactId>api-gateway-module</artifactId> |
| <version>0.0.1-SNAPSHOT</version> |
| <packaging>jar</packaging> |
| |
| <properties> |
| <java.version>1.8</java.version> |
| </properties> |
| <dependencies> |
| <dependency> |
| <groupId>org.springframework.boot</groupId> |
| <artifactId>spring-boot-starter</artifactId> |
| </dependency> |
| |
| <dependency> |
| <groupId>org.springframework.boot</groupId> |
| <artifactId>spring-boot-starter-test</artifactId> |
| <scope>test</scope> |
| </dependency> |
| </dependencies> |
| |
| <build> |
| <plugins> |
| <plugin> |
| <groupId>org.springframework.boot</groupId> |
| <artifactId>spring-boot-maven-plugin</artifactId> |
| </plugin> |
| </plugins> |
| </build> |
| |
| </project> |
# 2.7.4 在 父项目的 pom 中添加 modules 标签
| <modules> |
| <module>api-gateway-module</module> |
| </modules> |
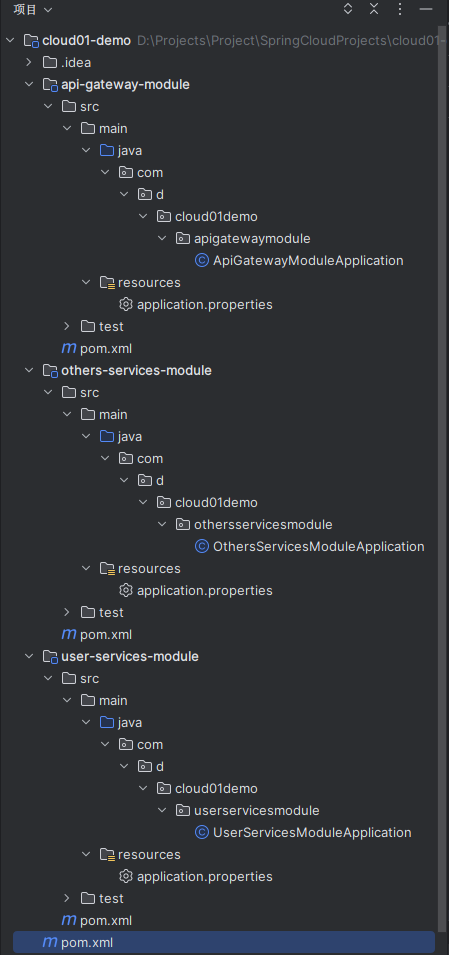
# 2.8.x 按照 2.7 的步骤创建其余模块
最终的目录结构:![image.png]()
# 3 配置 api-gateway-module 模块
# 3.1 引依赖
| <dependency> |
| <groupId>com.alibaba.cloud</groupId> |
| <artifactId>spring-cloud-starter-alibaba-nacos-discovery</artifactId> |
| </dependency> |
| |
| <dependency> |
| <groupId>org.springframework.cloud</groupId> |
| <artifactId>spring-cloud-starter-gateway</artifactId> |
| </dependency> |
# 3.2 打注解
| @SpringBootApplication |
| @EnableDiscoveryClient |
| public class ApiGatewayModuleApplication { |
| |
| public static void main(String[] args) { |
| SpringApplication.run(ApiGatewayModuleApplication.class, args); |
| } |
| |
| } |
# 3.3 写配置
| server: |
| port: 7777 |
| spring: |
| application: |
| |
| name: yiyou-gateway |
| cloud: |
| nacos: |
| discovery: |
| server-addr: nacos服务器的ip:端口号 |
| username: nacos/conf/application.properties 中的 nacos.core.auth.server.identity.key 配置项 |
| password: nacos/conf/application.properties 中的 nacos.core.auth.server.identity.value 配置项 |
| gateway: |
| discovery: |
| locator: |
| |
| enabled: true |
| routes: |
| |
| |
| |
| - id: provider-user-services |
| |
| |
| |
| uri: lb://user-services |
| |
| predicates: |
| |
| |
| - Path=/user/** |
| |
| - Method=GET,POST,PUT,DELETE |
# 4 配置 others-services-module
这里就以微信小程序登录为第三方接口为例。
# 4.1 引依赖
| <dependency> |
| <groupId>com.alibaba.cloud</groupId> |
| <artifactId>spring-cloud-starter-alibaba-nacos-discovery</artifactId> |
| </dependency> |
| |
| <dependency> |
| <groupId>org.springframework.cloud</groupId> |
| <artifactId>spring-cloud-starter-openfeign</artifactId> |
| </dependency> |
| |
| <dependency> |
| <groupId>org.springframework.boot</groupId> |
| <artifactId>spring-boot-starter-web</artifactId> |
| </dependency> |
| |
| <dependency> |
| <groupId>org.projectlombok</groupId> |
| <artifactId>lombok</artifactId> |
| </dependency> |
# 4.2 写配置
| server: |
| port: 7778 |
| spring: |
| application: |
| |
| name: others-services |
| cloud: |
| nacos: |
| discovery: |
| server-addr: nacos服务器的ip:端口号 |
| username: nacos/conf/application.properties 中的 nacos.core.auth.server.identity.key 配置项 |
| password: nacos/conf/application.properties 中的 nacos.core.auth.server.identity.value 配置项 |
| others-service-feign: |
| wechat-mini-program: |
| url: api.weixin.qq.com |
# 4.3 编写 第三方接口 的请求对象和响应对象
| package com.d.cloud01demo.othersservicesmodule.feign.request; |
| |
| import lombok.Data; |
| import lombok.NoArgsConstructor; |
| |
| import java.io.Serializable; |
| |
| |
| * @description: 微信小程序登录请求实体类对象 |
| * @author: Ding |
| * @version: 1.0 |
| * @createTime: 2023-04-09 11:10:04 |
| * @modify: |
| */ |
| |
| |
| @Data |
| @NoArgsConstructor |
| public class WechatMiniProgramLoginRequest implements Serializable { |
| |
| |
| * 登录时获取的 code |
| */ |
| private String js_code; |
| |
| |
| * 小程序 appid |
| */ |
| private String appid; |
| |
| |
| * 小程序 appSecret |
| */ |
| private String secret; |
| |
| |
| * 授权类型,此处只需填写 authorization_code |
| */ |
| private String grant_type = "authorization_code"; |
| |
| private static final long serialVersionUID = 1L; |
| } |
| package com.d.cloud01demo.othersservicesmodule.feign.response; |
| |
| import lombok.Data; |
| |
| import java.io.Serializable; |
| |
| |
| * @description: 微信小程序登录请求响应对象 |
| * @author: Ding |
| * @version: 1.0 |
| * @createTime: 2023-04-09 11:11:16 |
| * @modify: |
| */ |
| |
| |
| @Data |
| public class WechatMiniProgramLoginResponse implements Serializable { |
| |
| |
| * 会话密钥 |
| */ |
| private String session_key; |
| |
| |
| * 用户在开放平台的唯一标识符,若当前小程序已绑定到微信开放平台帐号下会返回,详见 <a href="https://developers.weixin.qq.com/miniprogram/dev/framework/open-ability/union-id.html">UnionID 机制说明 & lt;/a>。 |
| */ |
| private String unionid; |
| |
| |
| * 错误信息 |
| */ |
| private String errmsg; |
| |
| |
| * 用户唯一标识 |
| */ |
| private String openid; |
| |
| |
| * 错误码 |
| */ |
| private Integer errcode; |
| |
| private static final long serialVersionUID = 1L; |
| |
| } |
# 4.4 编写 FeignClient 类
| package com.d.cloud01demo.othersservicesmodule.feign; |
| |
| import com.d.cloud01demo.othersservicesmodule.feign.request.WechatMiniProgramLoginRequest; |
| import com.d.cloud01demo.othersservicesmodule.feign.response.WechatMiniProgramLoginResponse; |
| import org.springframework.cloud.openfeign.FeignClient; |
| import org.springframework.cloud.openfeign.SpringQueryMap; |
| import org.springframework.web.bind.annotation.GetMapping; |
| |
| |
| * @description: |
| * @author: Ding |
| * @version: 1.0 |
| * @createTime: 2023-04-09 15:57:27 |
| * @modify: |
| */ |
| |
| @FeignClient(name = "wechatMiniProgramService", url = "${others-service-feign.wechat-mini-program.url}") |
| public interface FeignWechatService { |
| |
| |
| * 定义微信小程序的登录接口,通过 feign 进行调用 |
| * @param request 接口请求对象 |
| * @return 返回登录接口的响应对象 |
| */ |
| @GetMapping("/sns/jscode2session") |
| WechatMiniProgramLoginResponse login(@SpringQueryMap WechatMiniProgramLoginRequest request); |
| |
| |
| } |
# 4.5 在启动类上添加注解
| @SpringBootApplication |
| @EnableDiscoveryClient |
| @EnableFeignClients(basePackages = "com.d.cloud01demo.othersservicesmodule.feign") |
| public class OthersServicesModuleApplication { |
| |
| public static void main(String[] args) { |
| SpringApplication.run(OthersServicesModuleApplication.class, args); |
| } |
| |
| } |
# 4.6 编写 Controller 类
| package com.d.cloud01demo.othersservicesmodule.web.controller; |
| |
| import com.d.cloud01demo.othersservicesmodule.feign.FeignWechatService; |
| import com.d.cloud01demo.othersservicesmodule.feign.request.WechatMiniProgramLoginRequest; |
| import lombok.extern.slf4j.Slf4j; |
| import org.springframework.beans.factory.annotation.Autowired; |
| import org.springframework.web.bind.annotation.GetMapping; |
| import org.springframework.web.bind.annotation.PathVariable; |
| import org.springframework.web.bind.annotation.RequestMapping; |
| import org.springframework.web.bind.annotation.RestController; |
| |
| |
| * @description: |
| * @author: Ding |
| * @version: 1.0 |
| * @createTime: 2023-04-09 16:04:23 |
| * @modify: |
| */ |
| |
| @Slf4j |
| @RestController |
| @RequestMapping("/others/wechat") |
| public class WechatController { |
| |
| @Autowired |
| private FeignWechatService feignWechatService; |
| |
| @GetMapping("/login/code/{code}") |
| public Object login(@PathVariable String code) { |
| log.info("others-services-module 收到请求"); |
| log.info("code: " + code); |
| |
| |
| return "success"; |
| } |
| |
| } |
# 5 配置 user-services-module 模块
# 5.1 引依赖
| <dependency> |
| <groupId>org.springframework.boot</groupId> |
| <artifactId>spring-boot-starter-web</artifactId> |
| </dependency> |
| |
| <dependency> |
| <groupId>com.alibaba.cloud</groupId> |
| <artifactId>spring-cloud-starter-alibaba-nacos-discovery</artifactId> |
| </dependency> |
| |
| <dependency> |
| <groupId>org.springframework.cloud</groupId> |
| <artifactId>spring-cloud-starter-openfeign</artifactId> |
| </dependency> |
| |
| <dependency> |
| <groupId>org.projectlombok</groupId> |
| <artifactId>lombok</artifactId> |
| </dependency> |
# 5.2 写配置
| server: |
| port: 7779 |
| spring: |
| application: |
| |
| name: user-services |
| cloud: |
| nacos: |
| discovery: |
| server-addr: nacos服务器的ip:端口号 |
| username: nacos/conf/application.properties 中的 nacos.core.auth.server.identity.key 配置项 |
| password: nacos/conf/application.properties 中的 nacos.core.auth.server.identity.value 配置项 |
| user-services-feign: |
| others-services: |
| url: localhost:7779 |
# 5.3 编写远程调用的 FeignClient
| package com.d.cloud01demo.userservicesmodule.feign; |
| |
| import org.springframework.cloud.openfeign.FeignClient; |
| import org.springframework.web.bind.annotation.GetMapping; |
| import org.springframework.web.bind.annotation.PathVariable; |
| |
| |
| * @description: |
| * @author: Ding |
| * @version: 1.0 |
| * @createTime: 2023-04-09 16:13:52 |
| * @modify: |
| */ |
| |
| @FeignClient(name = "others-services", url = "${user-services-feign.others-services.url}") |
| public interface FeignOthersServices { |
| |
| @GetMapping("/others/wechat/login/code/{code}") |
| String login(@PathVariable String code); |
| |
| } |
# 5.4 在启动类上添加注解
| package com.d.cloud01demo.userservicesmodule; |
| |
| import org.springframework.boot.SpringApplication; |
| import org.springframework.boot.autoconfigure.SpringBootApplication; |
| import org.springframework.cloud.client.discovery.EnableDiscoveryClient; |
| import org.springframework.cloud.openfeign.EnableFeignClients; |
| |
| @SpringBootApplication |
| @EnableDiscoveryClient |
| @EnableFeignClients(basePackages = {"com.d.cloud01demo.userservicesmodule.feign"}) |
| public class UserServicesModuleApplication { |
| |
| public static void main(String[] args) { |
| SpringApplication.run(UserServicesModuleApplication.class, args); |
| } |
| |
| } |
# 5.5 编写 Controller 类
| package com.d.cloud01demo.userservicesmodule.web.controller; |
| |
| import com.d.cloud01demo.userservicesmodule.feign.FeignOthersServices; |
| import lombok.extern.slf4j.Slf4j; |
| import org.springframework.beans.factory.annotation.Autowired; |
| import org.springframework.web.bind.annotation.GetMapping; |
| import org.springframework.web.bind.annotation.PathVariable; |
| import org.springframework.web.bind.annotation.RequestMapping; |
| import org.springframework.web.bind.annotation.RestController; |
| |
| |
| * @description: |
| * @author: Ding |
| * @version: 1.0 |
| * @createTime: 2023-04-09 15:48:47 |
| * @modify: |
| */ |
| |
| @Slf4j |
| @RestController |
| @RequestMapping("/user") |
| public class UserController { |
| |
| @Autowired |
| private FeignOthersServices feignOthersServices; |
| |
| @GetMapping("/wechat/login/code/{code}") |
| public Object login(@PathVariable String code) { |
| String result = feignOthersServices.login(code); |
| log.info("请求成功"); |
| log.info("result: " + result); |
| return result; |
| } |
| |
| } |
# 6 启动项目
都启动之后,即可成功访问
# 总结
- SpringCloud 和 SpringCloudAlibaba 和 SpringBoot 的版本对应关系在:版本说明
 通过这里可知,Nacos 需要 2.1.0 的版本。那么就需要在服务器上安装 2.1.0 的 Nacos 环境。这里就不赘述了,按照 Nacos 官网文档来即可。然后其他组件的版本也可以确定了最终选择的版本信息如下: